

I purchased a few small faux cream-colored pumpkins at Michael's and decided to try my hand as creating polka dots for a fun and whimsical design. You can find faux pumpkins at any craft store. You may even have faux pumpkins left over from last year which you could paint the base cream color before adding the polka dots. I decided on a black and cream theme (with pops of orange) for these areas so black polka dots were an obvious choice. Because I have solid black glitter pumpkins which go with the polka dot pumpkins, I made my dots glittery as well.

Here's how to get your polka dot on:

BEFORE
- Pour a little bit of black paint onto a small paper plate. Using a foam pouncer (from Martha Stewart crafts), dip evenly into paint and press onto pumpkin. Lift pouncer and check that dot is covered fully with enough paint.
- Gently sprinkle wet paint with course glitter (Martha Stewart crafts) in crystal. Tap to remove any excess glitter. I did this step over large baking sheet to collect glitter.
- Continue to randomly place painted polka dots around pumpkin and adding glitter as you go. You can probably do up to 3 dots at a time before adding glitter but you don't want paint to dry too much before adding glitter.
- Be careful where you put your fingers as you place dots. It gets a little tricky as you continue to add dots. You don't want to smudge previously painted dots. If this happens (which it did to me a few times - grrr), just get a damp paper towel and wipe off your mistake. Replace dot you removed with a new smudge-free glitter dot.
- Last but not least - paint stem with black paint and add glitter. Let the painted polka dots dry.

This project is very forgiving. If you mess up or smudge a dot, just wipe if off and start over.

Monogrammed Version:
- IMPORTANT - Start with monogram first if you are choosing this style polka dot pumpkin.
- I placed a large lower case sticker onto pumpkin. I did not add any additional heavy duty adhesive to sticker back but would consider it for next time. I noticed the edges seemed to come up a little because of the curve of the pumpkin which bothered me. I'm a little OCD that way :-/
- Carefully paint letter with Mod Podge. Sprinkle with course glitter. I used the smallest foam pouncer (which is just a little larger than a pencil eraser) to place a dot on either side of letter. It gives the letter definition.
- Begin placing dots as described above.
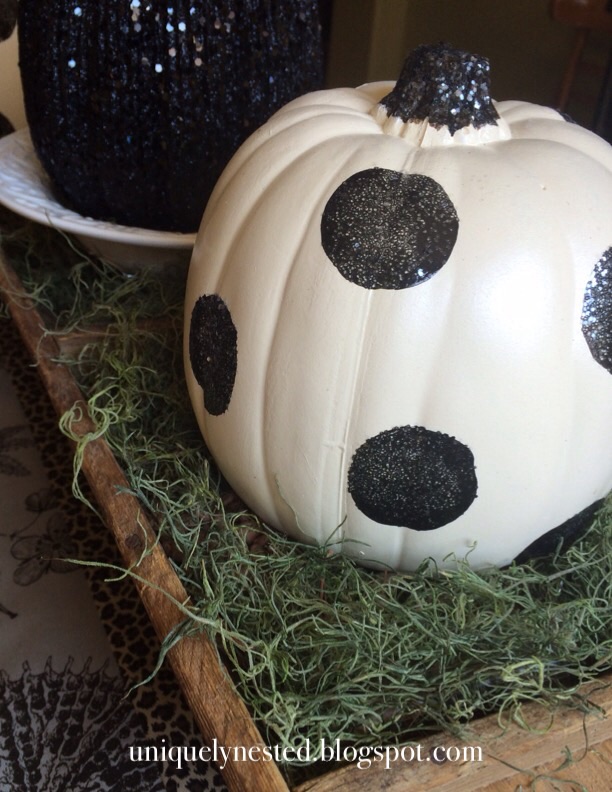
Here's a sneak peek (pictures below) of a polka dot pumpkin on my entry way table and dining table. That's all on that for now... look for an upcoming post so you can see finished design.

This simple (yet spooktacular) craft is incredibly easy, a little messy (you know how glitter gets everywhere) but oh so eye-catching and impactful for a Halloween design. I hope you'll give it a try. I'm actually thinking of making a few more painted pumpkins with orange dots (for general fall decor/Thanksgiving) as well as striped ones in black or orange. You could even paint on just the Mod Podge in dots or stripes and cover in a clear glitter (for a tone on tone look) or colored glitter to give it a pop.

The Polka Dot Pumpkins only require only 4 items (which you may already have on hand) - faux pumpkins, black craft paint, foam pouncer set and course glitter. I currently have them in my entry way, dining room, and one in my powder room (more on that later). I'm thinking of creating a few more for my kitchen island and window. Where will you put your Polka Dot Pumpkins?
The Polka Dot Pumpkins only require only 4 items (which you may already have on hand) - faux pumpkins, black craft paint, foam pouncer set and course glitter. I currently have them in my entry way, dining room, and one in my powder room (more on that later). I'm thinking of creating a few more for my kitchen island and window. Where will you put your Polka Dot Pumpkins?
No comments:
Post a Comment