Friday, March 25, 2016

Play {Therapy} Room Design Plan

Have you ever heard the expression, "March comes in like a lion and out like a lamb"?  I always thought it had something to do with the Easter season since it's generally celebrated toward the end of March.  But the saying is actually related to the unpredictable weather in early spring with March often being blustery and cold one day then calm and sunny another day.  That's how my month has been and it hasn't had anything to do with the weather!  It's been a crazy month in our household so my posts (okay, post) have been lacking (to say the least).  Between my birthday at the beginning of the month, travel-work demands, a dog with chronic allergies, spring break, and my son's oral surgery (NOT a fun way to spend a break from school), our month is finally beginning to calm down.  Keep your fingers crossed!

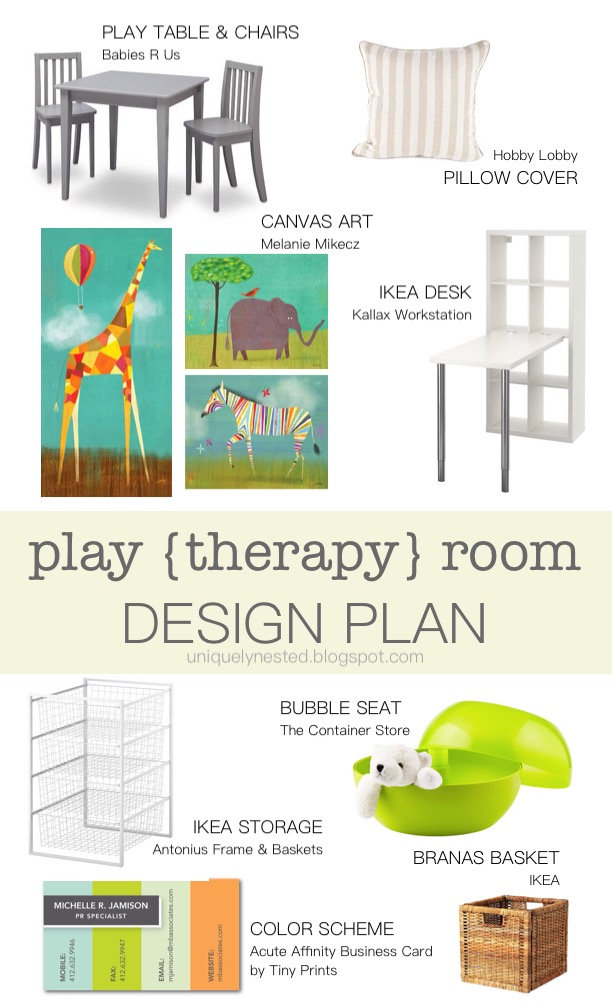
During my limited down time and periods of relative calm (I do live in a house full of boys), I've been helping a friend redesign her family play room.  I like the design so much that I think I'm going to steal it for my new therapy room! Here's the design:


I say "family" because she wanted the gender neutral room to be functional for both children and adults.  My friend needs a work space within the room where she can pay bills, plan meals, or peruse Pinterest when she's not playing with the kids. 


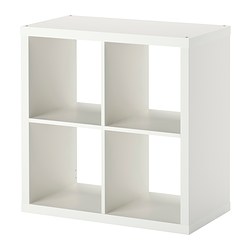
I incorporated the Kallax workstation (IKEA) which combines a desk with storage shelving for books or craft supplies.  She could even add a smaller Kallax shelf with four openings on each side of workstation for additional storage.  As an added bonus, it would also offer display space on top of the side shelving.


My original inspiration for the room came from children's artwork by Melanie Mikecz.  You can find it online at Rosenberry Rooms and Oopsy Daisy.  


The Elephant and Red Bird


Too Tall Giraffe


Rainbow Zebra


The art is happy and kid-friendly but not babyish.  The fun but slightly muted colors really inspired me and would flow with the rest of her home. Another friend (Hi - Dr. Amy) has this same art in the waiting room of her pediatric dental practice.  It makes me smile every time I walk in the door.  


I added the Branas basket (IKEA) to the workstation shelving to offer much needed hidden storage.  I actually have these in my home office/craft room. They are very sturdy and hold a lot of stuff.  The tag holder (below) from The Container Store can be added to baskets to identify their contents.  I'm BIG into labeling.  It helps you see at-a-glance what you have in a particular container.  It also helps you stay organized.  


I just happened to come across the gray play table and chairs for kids (which my friend loved) when shopping online for an upcoming baby shower at Toys R Us.  It fits the design scheme perfectly because we wanted the table in gray but didn't want to spend big bucks.  I think $99 is an excellent price for all three pieces.  It's much less expensive than the Pottery Barn or Land of Nod versions (although I love what these stores have to offer).  Some of us are on a budget.  Down here in Texas, I have not seen any money growing on trees. :-)  Bummer!
So we've covered covered the art, workspace (for mom), and play table.  Let's talk storage.  I think the Antonius frame and wire baskets unit (IKEA) is a great option for toy storage.  Whether you are storing lincoln logs, leggos, barbie dolls, or board games this will provide functional storage at a very affordable price.  The Container Store has a similar (but pricier) option in their elfa system.

Other items - throw pillows and storage seating - give the room interest and function.  We are thinking of adding an iron-on detail to striped pillow in a dark gray but haven't quite figured that out just yet. The Poppin Storage Seat has interior storage and also offers extra seating.  It can hold a person over 250 pounds!  


Poppin Box Seat 
The Container Store

Bubble Storage Stool
The Container Store

Striped Pillow Cover
Hobby Lobby

I really hope my friend doesn't mind me "borrowing" the design for my therapy room.  I'm loving it that much!  


Do you have a craft room, play space or multipurpose room that needs a family-friendly revamping?  Maybe this design plan will work for you too!  

Monday, March 7, 2016

Coconut Cream Cake

What kind of cake do you like for your birthday celebration? You could always go with chocolate which is one of my favorites.  I celebrated my big day over the weekend.  This year I had a serious craving for coconut. I was tempted to make a coconut cream pie but pie just seemed wrong for a birthday. Instead of picking up a store bought cake (which my family had every intention of doing), I told them I would satisfy my birthday cake craving by baking a Coconut Cream Cake.


Using a boxed vanilla cake mix as my base, I used canned coconut milk instead of water and added a teaspoon of coconut flavoring.  I placed all ingredients in stand mixer and mixed until blended.


I buttered and floured a 6" x 3" round aluminum cake pan.  I also added a parchment round inside pan and coated it with cooking spray.  I did not want this cake to stick!  My cake didn't quite come to top edge but it easily came out of the pan.

Fill pan three-quarters of the way full.  You want the cake to bake up to top edge of pan.  This will allow you to have 2 - 1.5" layers or 3 - 1" layers.  I went with 2 layers on this cake.  I used a cake leveler to level cake and then cut cake in half.


Place first layer on foil-covered cake round.  Add 1/2 cup of frosting and spread over layer.  Place second layer on top of first layer.  Add 1/2 cup of frosting on second layer and spread evenly.  


Using an offset spatula, add additional frosting around sides of cake  and spread evenly.  This doesn't have to be perfect because you will cover sides with toasted coconut flakes.

Frosting Top of Cake:  Place remaining frosting in piping bag fitted with #12 round tip.  Started on top edge of cake, pipe large dot of frosting.  Using tip of spatula, gently push frosting toward the right to create a "petal" on the left.  Continue making frosting petals all along edge, then move to inner circle making 3 concentric circles of petals.  Leave center empty - you will fill this with toasted coconut.


Toasting Coconut:  After cake is finished baking, reduce oven heat to 300 degrees.  Place 2-3 cups of sweetened coconut flakes on parchment lined baking sheet.  Spread out evenly.  Bake coconut flakes until lightly toasted.  I toasted coconut in 5 min increments (set a timer) until flakes are lightly toasted.  Keep your eye on it!  Edges tend to toast before center so you may need to move flakes around with spatula after each 5 minute baking increment. 


Coating Sides with Toasted Coconut:  In an effort of full disclosure, I must warn you - THIS STEP IS MESSY and there's no easy way around it.  I'm open to suggestions to make this step neater.  After coconut has cooled completely, it will be toasty, crispy, and yummy.  Place cake on cooling rack over baking sheet (to collect coconut flakes that fall).  Pick up a bunch of flakes with your fingers and gently push onto side of frosted cake.  Continue all around side of cake until completely covered.  You can use flakes that fall in pan below.  I made a lot of toasted coconut because I wasn't sure how much I'd need.  You probably only need 2 cups total.

I had enough batter left over to make a small batch of mini cup-cakes.  I added the same frosting and sprinkled tops with toasted coconut flakes.  These were a bonus and the perfect bite of deliciousness (I had to try one or two, maybe three, out for quality control purposes ;-).


This recipe was even a big hit with our canine family member.  Our golden doodle Bella thought the platter of mini cupcakes on the table was meant for her.  She enjoyed at least 3 or 4 (including the paper) before being busted by her big brother! Bad doggy!


Going, going...


This cake was gobbled up in less than 24 hours.  On a yumminess scale from 1 (yuck) -10 (amazing), my fourteen year old son gave the recipe an "11".  Yay!  That's very high marks coming from him because he can be picky.  He's actually eating the very last piece as I write this post (and the dog is eyeing him longingly begging for a bite).

Check out the recipe below